¶ Automatic Partitioning Advanced Options
This guide walks you through automatic partitioning with advanced options for your PikaOS installation.
Please see the automatic installation guide for basic automatic partitioning.
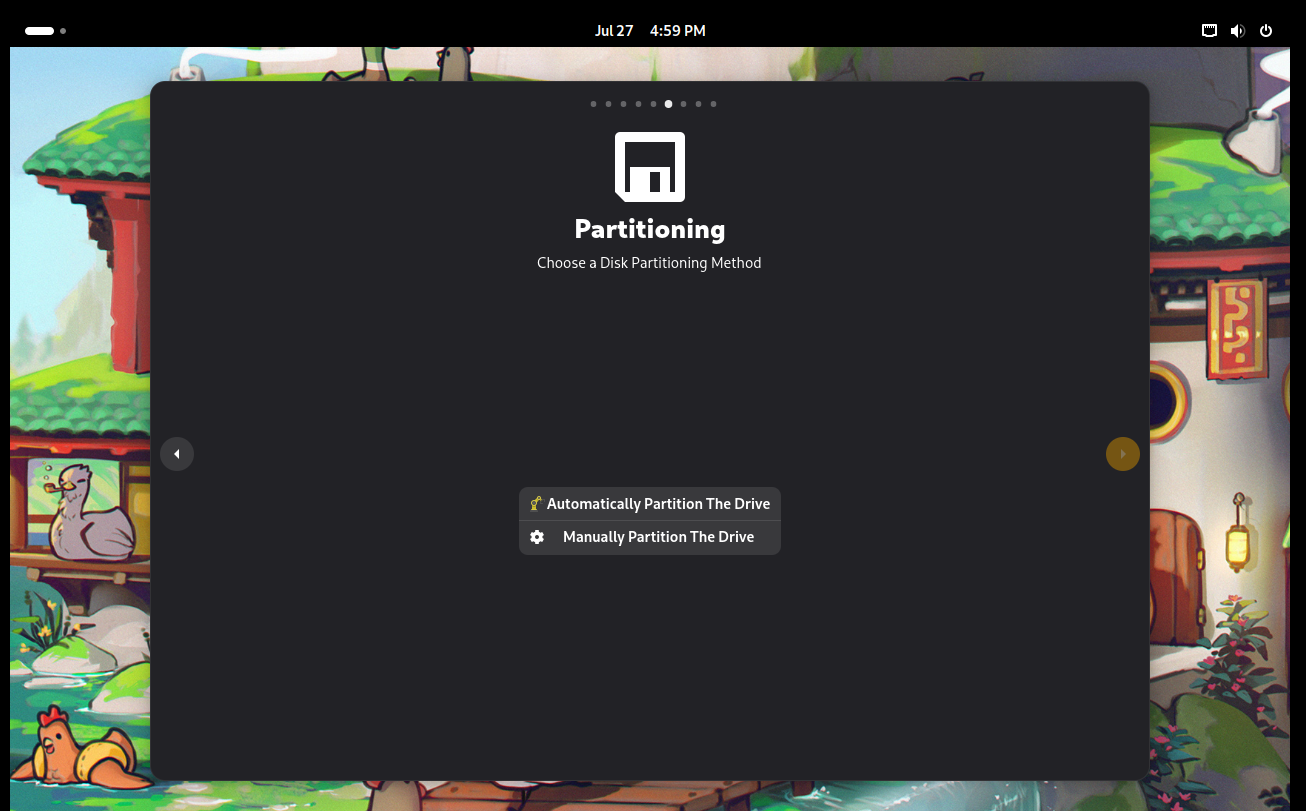
¶ Selecting Automatic Partitioning
During installation you will be provided the option for an automatic or manual installation. For this guide we will be selecting the upper listed option "Automatically Partition The Drive" as seen below:
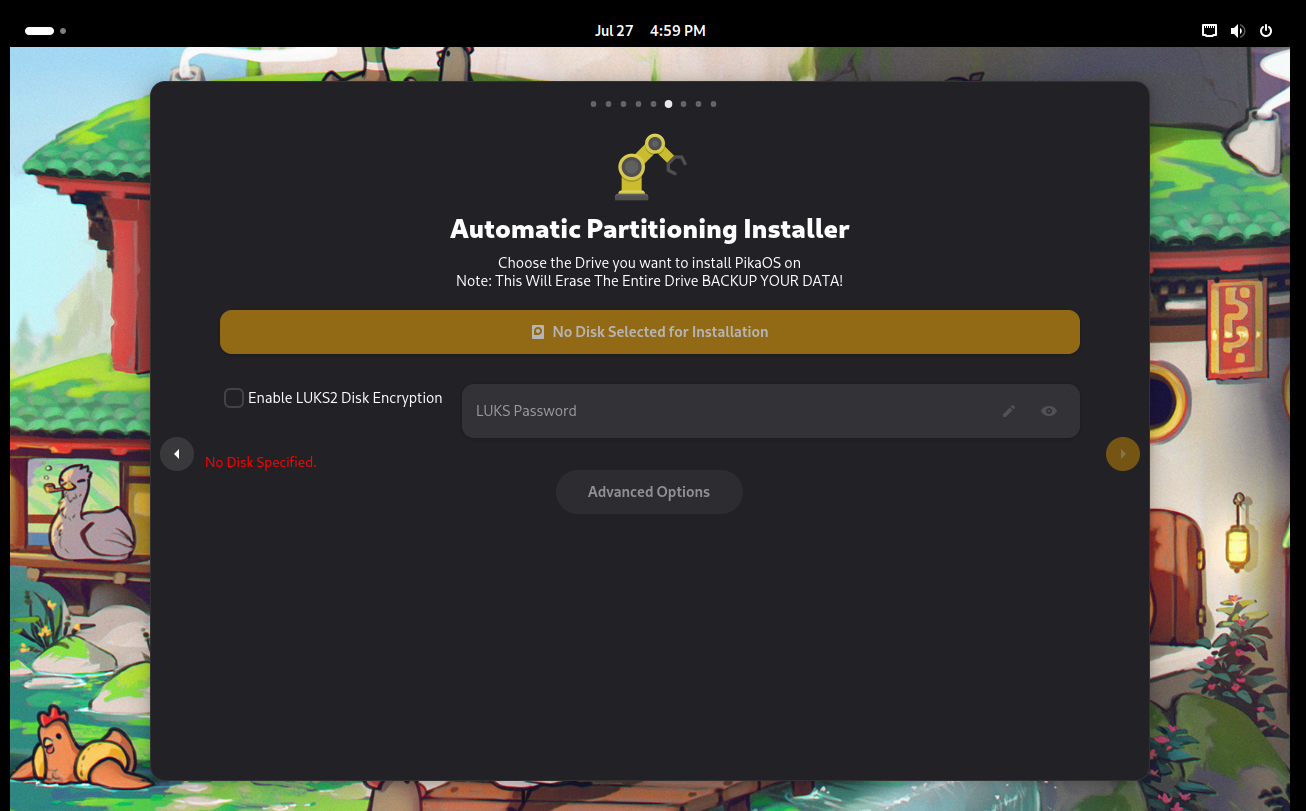
¶ Selecting The Installation Disk
You will be required to select a disk to install the system into. Select the yellow box currently labeled (No Disk Selected for Installation)
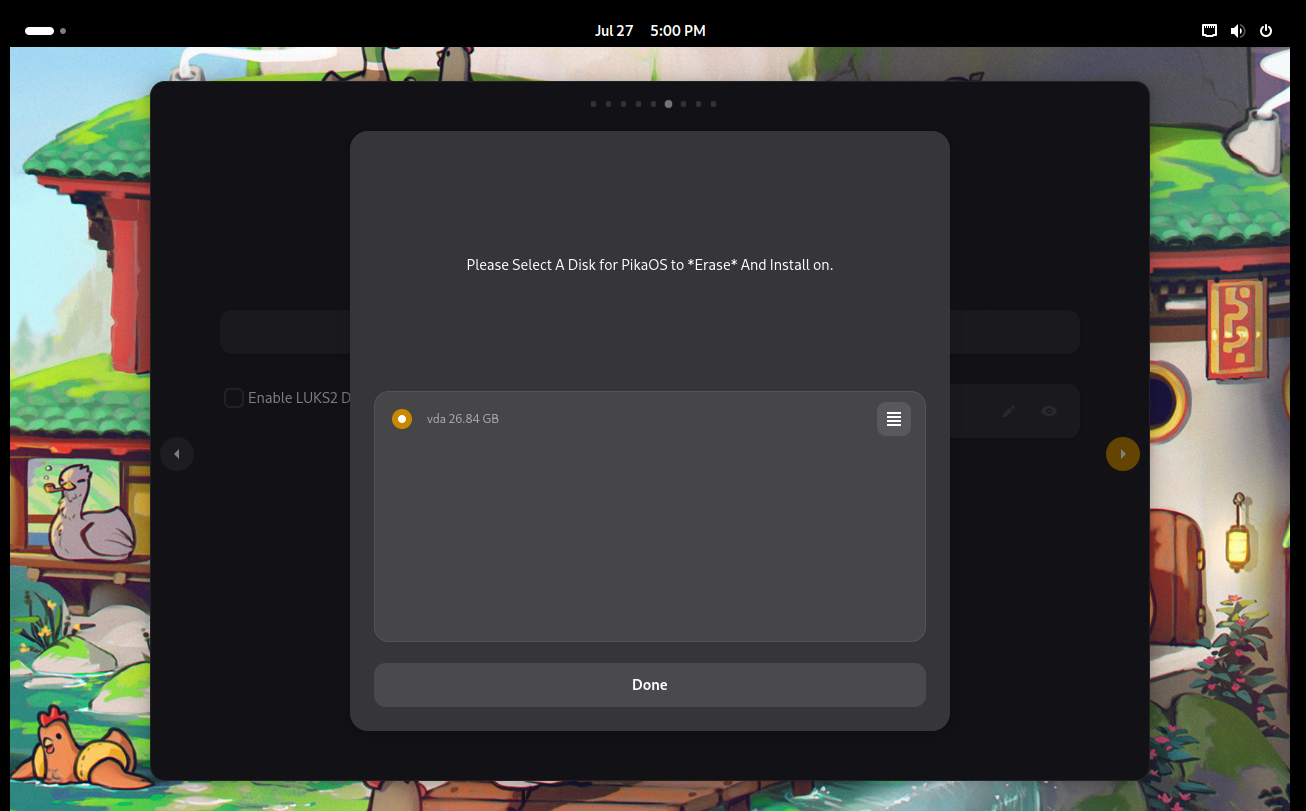
A window will appear allowing you to select a disk to install your system.
It should be noted that this will erase all the data on the disk and cannot be undone.
***Before installing, it is your responsibility to back up all data. ***
¶ Selecting The Filesystem, Home Directory Seperation, and Swap Size
By selecting the "Advanced Options" button, a new window will open:
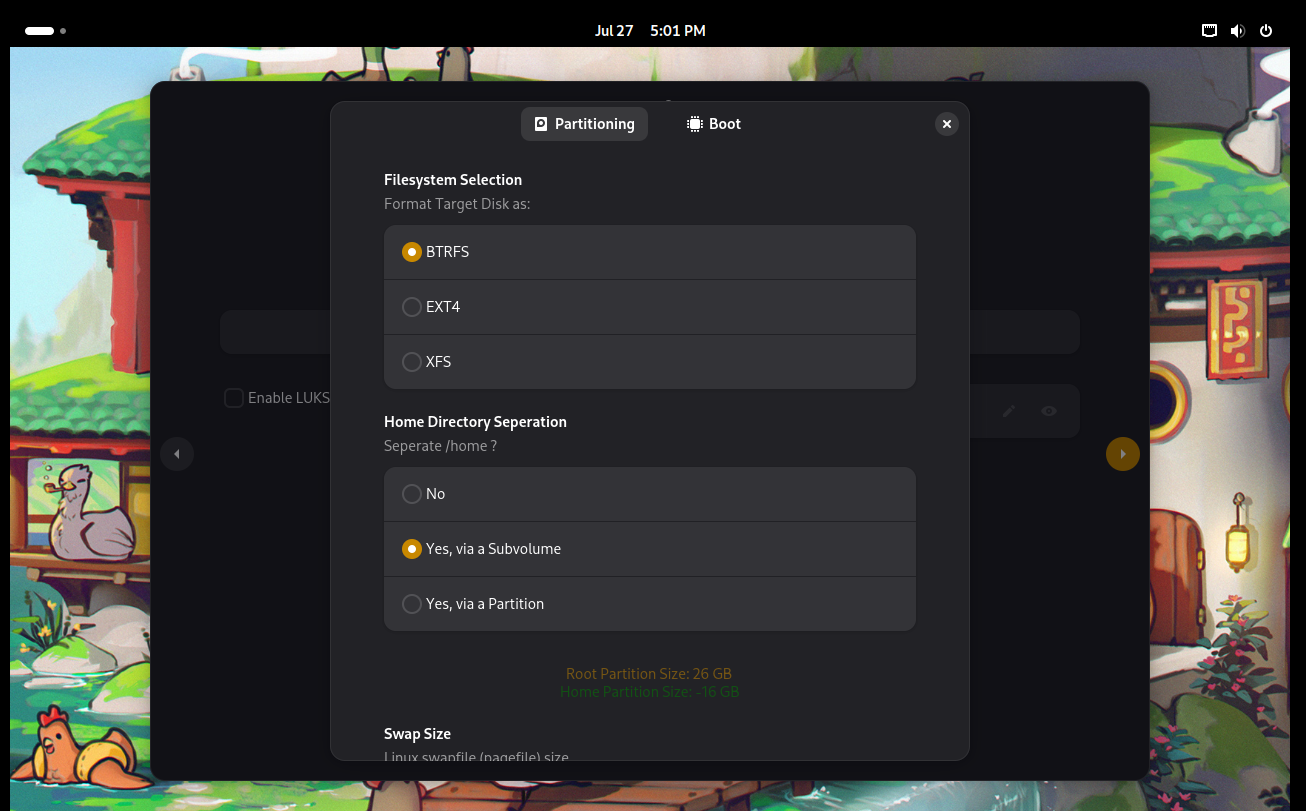
¶ Selecting The Filesystem
PikaOS offers three filesystems for use:
- BTRFS Default Selection
- EXT4
- XFS
Select your preferred filesystem by selecting the circle to the left of your choice.
¶ Selecting The Directory Seperation
PikaOS offers three options for Home Directory Seperation Options
- No
(no seperate Home Directory)
- Yes, via a Subvolume Default Selection
(a subvolume on the disk will be created for the Home Directory)
- Yes, via a Partition
(a seperate partition will be created for the Home Directory)
Select your preferred Home directory structure by selecting the circle to the left of your choice.
¶ Selecting The Swap Size
PikaOS offers three options for the swap size
- None/Zram Default Selection
(no swap file will be created. Swap will be handled by Zram)
- 1/2 of System Ram
(a swap file will be created equal to half of the installed system Ram)
- Equal to System Ram
(a swap file will be created equal to all of the installed system Ram)
- Custom Swap Size
(the user will manually select the swap file size in full gigabyte increments)
Select your preferred Swap size by selecting the circle to the left of your choice.
¶ Selecting Boot Options
PikaOS offers several additional boot options for ease of use ans compatibility.
Select the "Boot" button to the left of "Partitioning" to see these options:
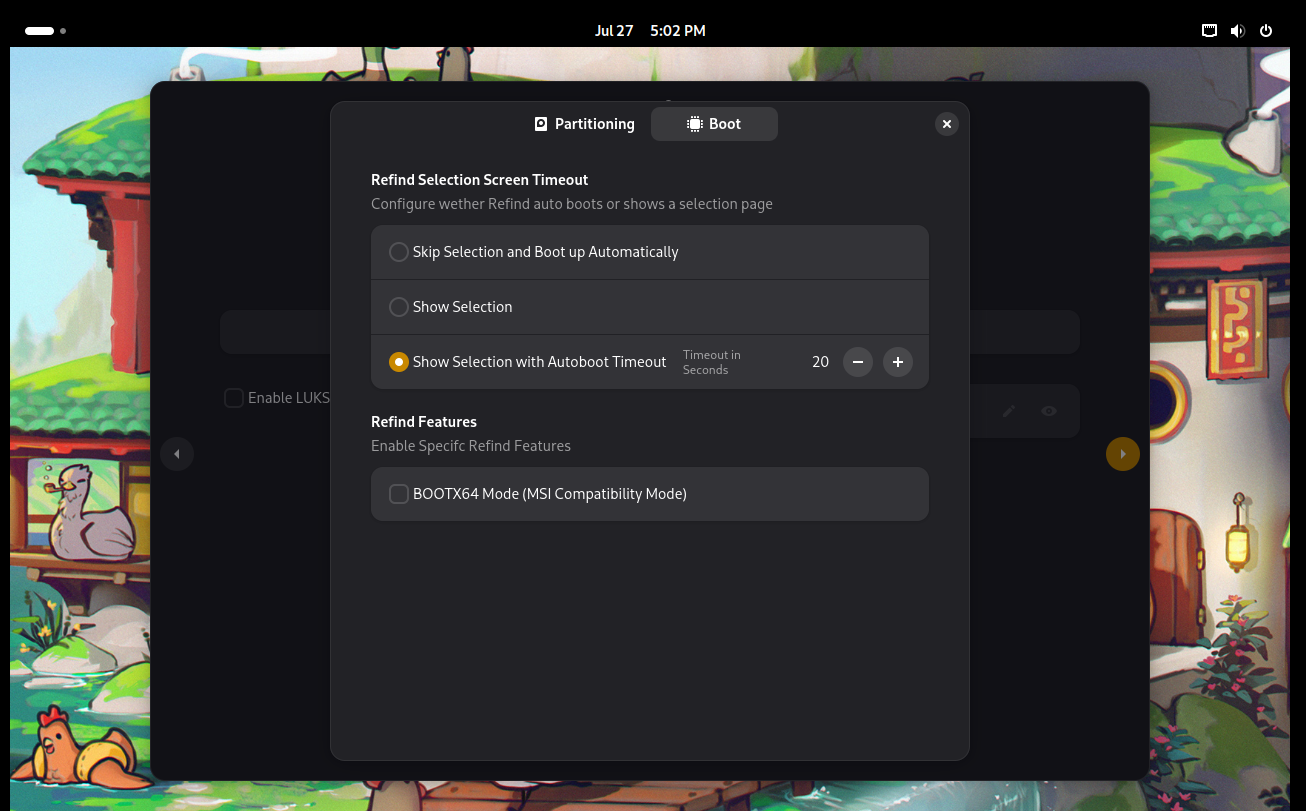
¶ ReFind Boot Options
PikaOS provides options during installation to manage how its default bootloader, ReFind , is displayed during boot.
- Skip Selection and Boot up Automatically
(ReFind will not display during boot and the user will be automatically booted into the last loaded system unless the user manually pushes the arrow keys to force the display of ReFind)
- Show Selection
(ReFind will display at each boot per its default configuration)
- Show Selection with Autoboot Timeout
(ReFind will display at each boot with the timeout in seconds manually selected by the user)
Select your preferred ReFind boot option by selecting the circle to the left of your choice.
¶ A Note For MSI Motherboards
If you are installing PikaOS to a MSI Motherboard or Laptop system, please select the "BOOTX64 Mode (MSI Compatibility Mode)" found in Advanced Options / Boot
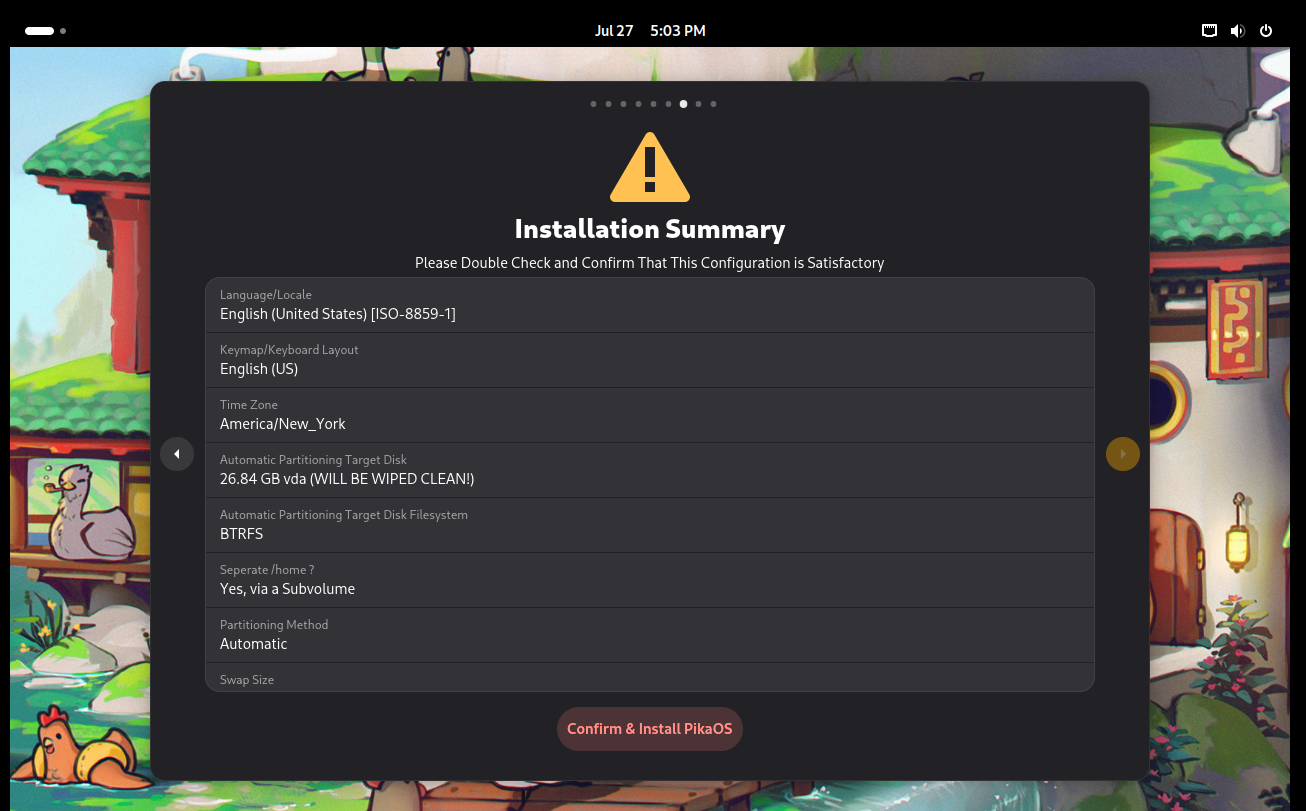
¶ Confirming Changes And Installing The System
After selecting your disk for installation continue by pressing the yellow arrow to the right of the installer and you will be greeted with a summary of the changes.
Ensure that everything listed is accurate and then select the red (Confirm & Install PikaOS) button.
Continue to the next section of the installation wiki