¶ Automatic Partitioning
This guide walks you through partitioning your PikaOS installation through the automatic partioning process. This will only cover the most common options in a PikaOS installation.
Please see the advanced installation guides for additional options not covered in this guide.
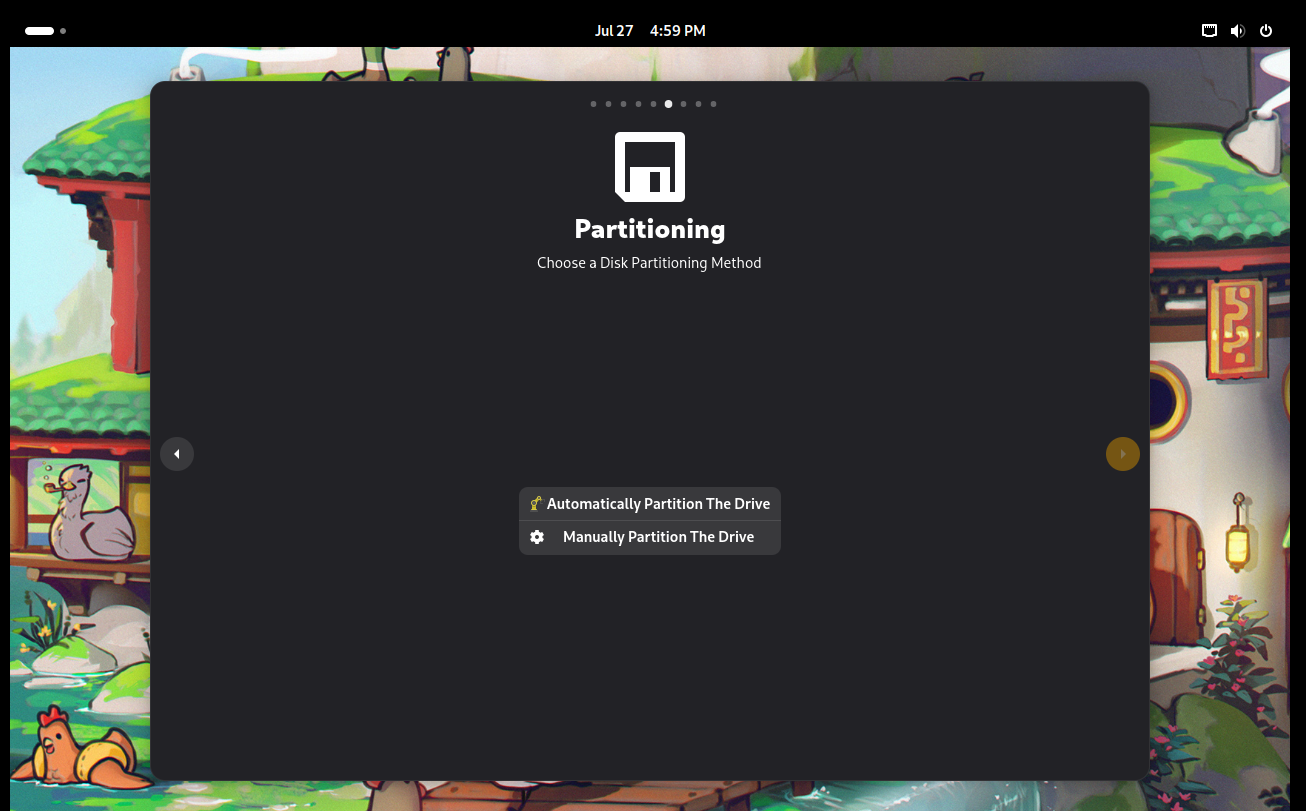
¶ Selecting Automatic Partitioning
During installation you will be provided the option for an automatic or manual installation. For this guide we will be selecting the top listed option "Automatically Partition The Drive" as seen below:
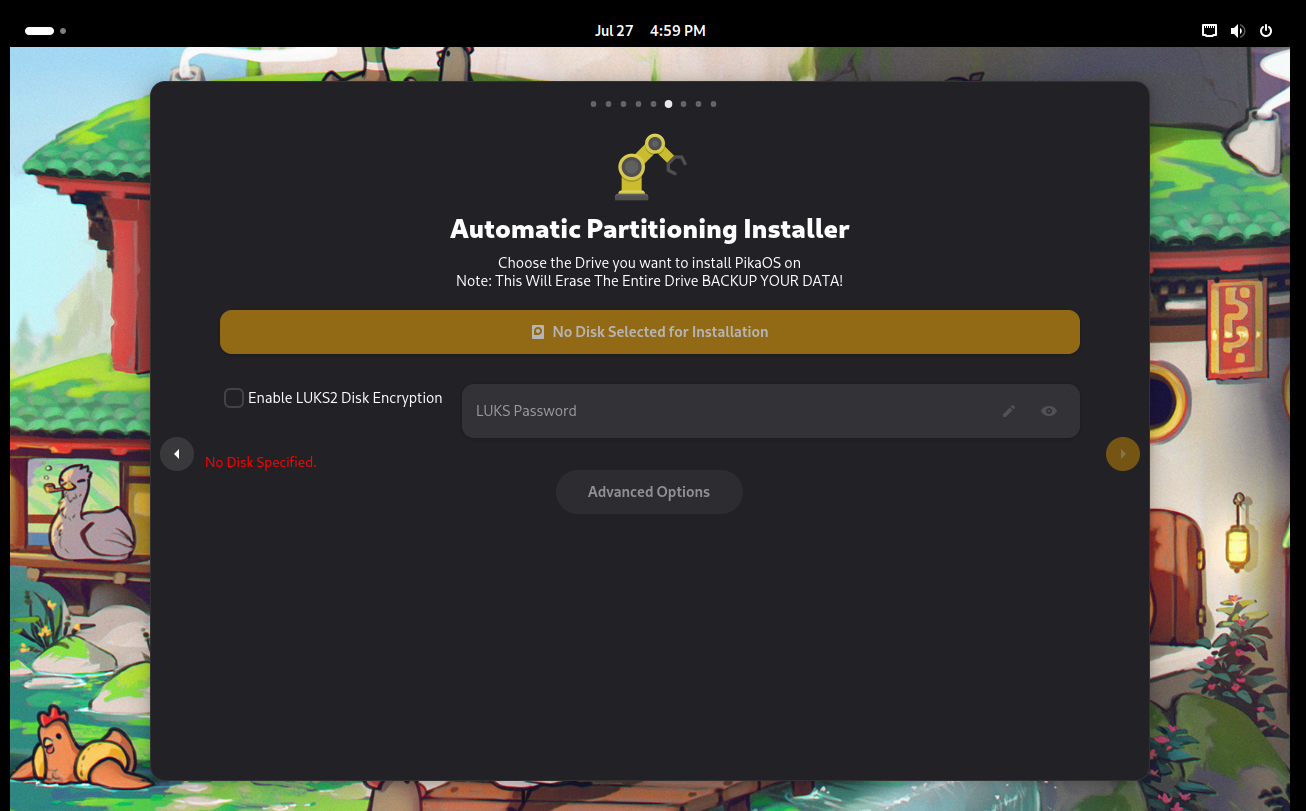
¶ Selecting The Installation Disk
You will be required to select a disk to install the system into. Select the yellow box currently labeled (No Disk Selected for Installation)
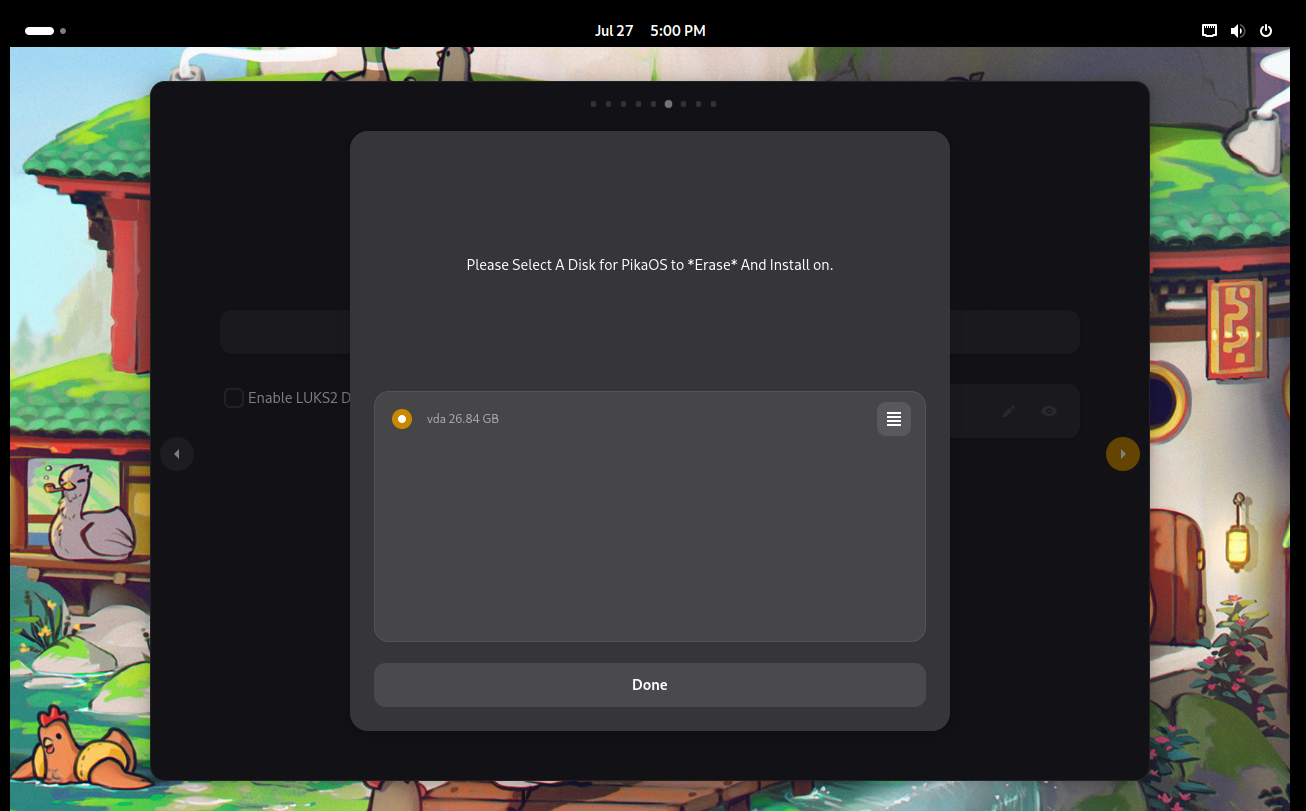
A window will appear allowing you to select a disk to install your system.
It should be noted that this will erase all the data on the disk and cannot be undone.
***Before installing, it is your responsibility to back up all data. ***
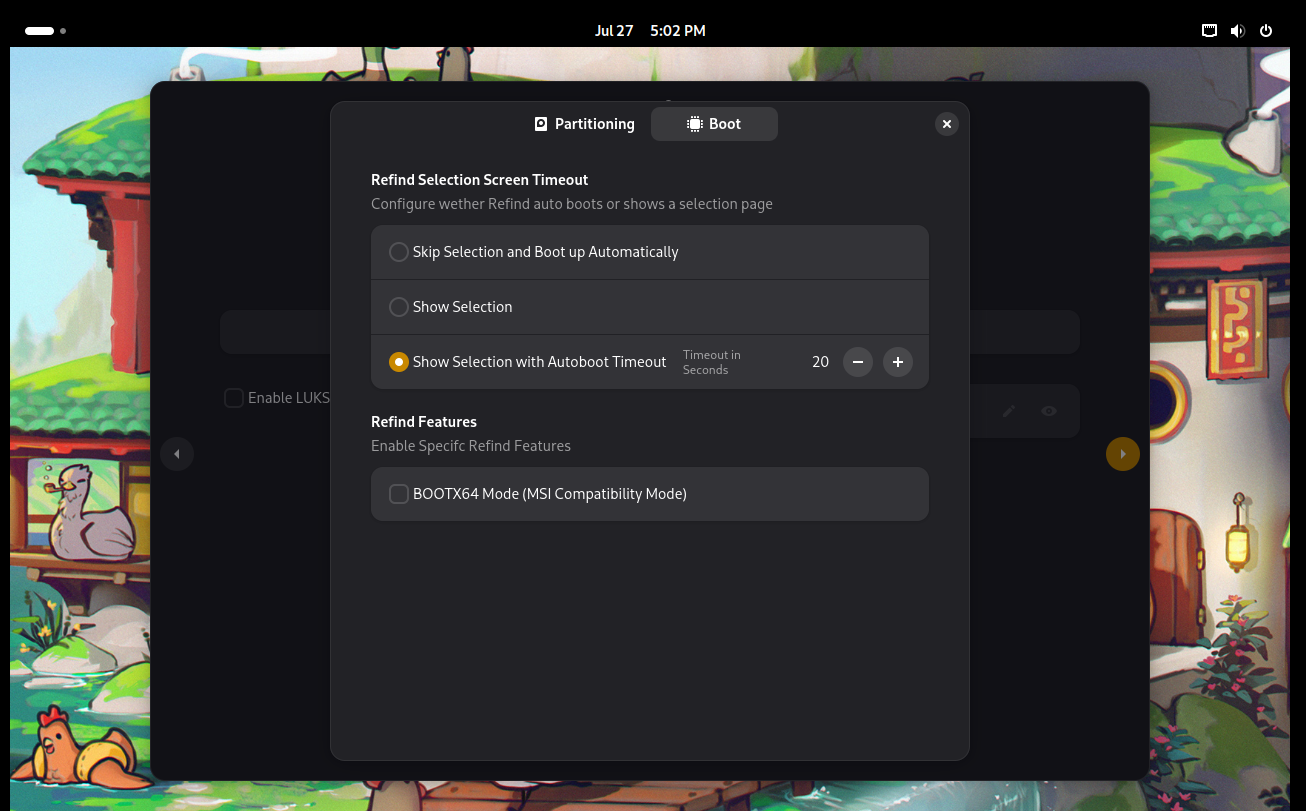
¶ A Note For MSI Motherboards
If you are installing PikaOS to a MSI Motherboard or Laptop system, please select the "BOOTX64 Mode (MSI Compatibility Mode)" found in Advanced Options / Boot
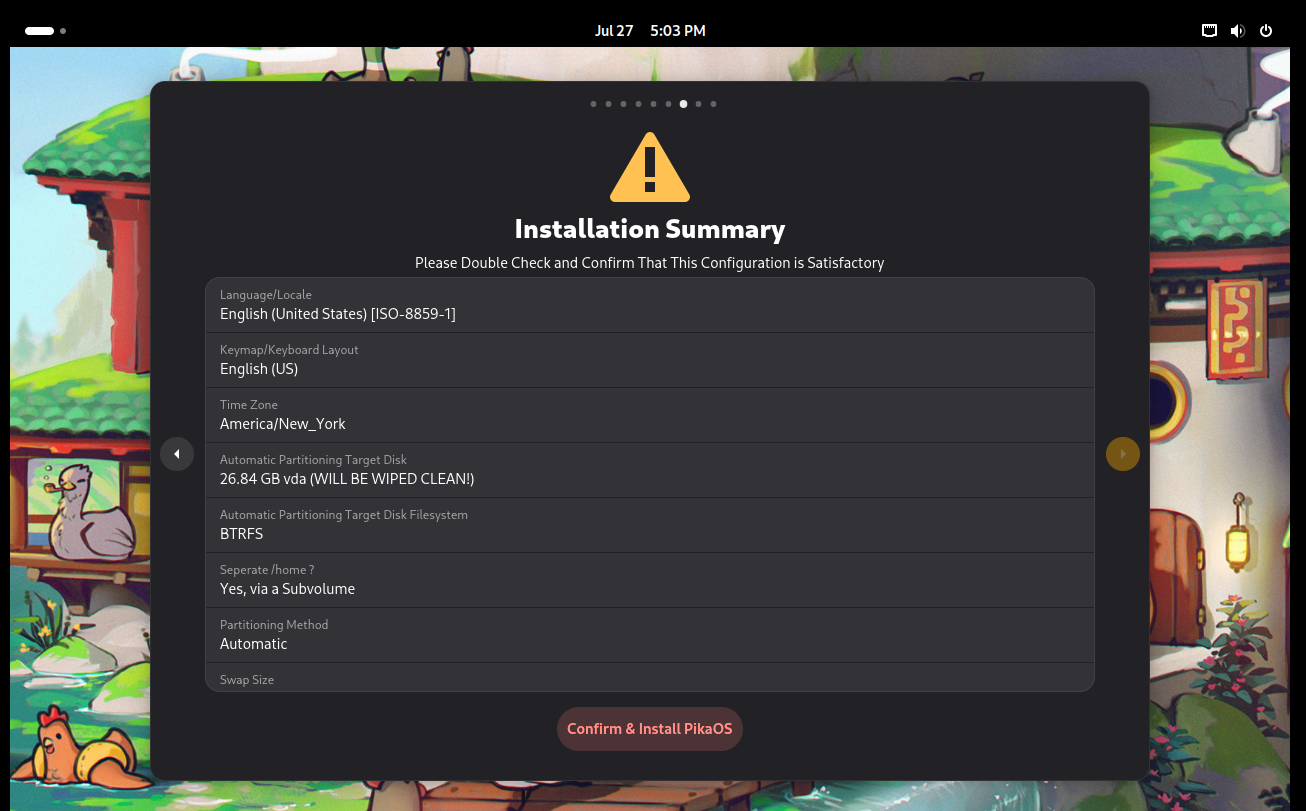
¶ Confirming Changes And Installing The System
After selecting your disk for installation continue by pressing the yellow arrow to the right of the installer and you will be greeted with a summary of the changes.
Ensure that everything listed is accurate and then select the red (Confirm & Install PikaOS) button.
Continue to the next section of the installation wiki